
Month: July 2025
Kyle Richards’ Pink and Red Striped Button Down
Kyle Richards’ Pink and Red Striped Button Down / Real Housewives of Beverly Hills Instagram Fashion July 2025
Kyle Richards looked pretty in pink (and red) wearing her striped button down. I’m bummed that I didn’t know she was in Chicago because I would have def tried to get up there and check everything out! But even though I didn’t get to see her in person I’m at least glad I got to see her in this adorable shirt on the ‘gram because I now know I need a similar one for myself.
Sincerely Stylish,
Jess

Photo: @kylerichards18
Style Stealers
!function(d,s,id){
var e, p = /^http:/.test(d.location) ? ‘http’ : ‘https’;
if(!d.getElementById(id)) {
e = d.createElement(s);
e.id = id;
e.src = p + ‘://widgets.rewardstyle.com/js/shopthepost.js’;
d.body.appendChild(e);
}
if(typeof window.__stp === ‘object’) if(d.readyState === ‘complete’) {
window.__stp.init();
}
}(document, ‘script’, ‘shopthepost-script’);

Turn on your JavaScript to view content
#NSALE Picks


Instagram By Request
-

Kyle Richards’ Flared Jeans
-

Lindsay Hubbard’s Brown Gingham Dress
-

Tamra Judge’s Pink Lace Shirt
-

Paige DeSorbo’s Pink Cover Up Skirt
-

Kyle Richards’ Pocket Jeans
-

Amanda Batula’s Navy Crop Top and Skirt Set
-

Stassi Schroeder’s Strapless Floral Corset Top
-

Tracy Tutor’s White Fringe Top and Skirt
-

Stassi Schroeder’s White and Tan Bubble Dress
-

Dolores Catania’s Blue Plaid Lace Trim Maxi Dress
-

Kristin Cavallari’s White Cropped Button Down Shirt
-

Cameran Eubanks’ Red Flower Halterneck Dress
-

Amanda Batula’s White Floral Applique Jacket
-

Amanda Batula’s Brown Ruffle Knit Vest
-

Madison LeCroy’s Brown Gingham Button Down
-

Amanda Batula’s White Bubble Hem Maxi Skirt
-

Amanda Batula’s Yellow Collared Top and Skirt
-

Paige DeSorbo’s Yellow Knit Pant Set
-

Lindsay Hubbard’s White Lace Top
-

Amanda Batula’s Brown Corset Midi Dress
-

Stassi Schroeder’s White Polka Dot Jacket
-

Cameran Eubanks’ White and Green Floral Dress
-

Emily Simpson’s Pink Floral Print Maxi Dress
-

Madison LeCroy’s Blue Striped Sweater
-

Melissa Gorga’s Pink Short Sleeve Tweed Mini Dress
Latest Posts


Originally posted at: Kyle Richards’ Pink and Red Striped Button Down
Read More
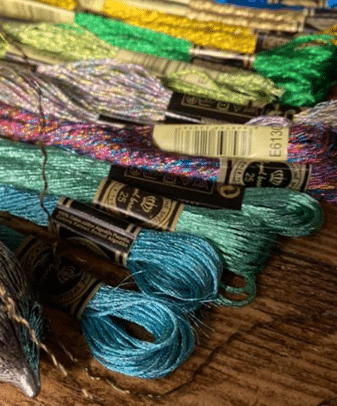
How to Make Your Own String Art

There’s a unique thrill in using ordinary, everyday materials to create an extraordinary piece of art – and string art offers just that! Using 1-inch nails, wood, and coloured thread, you can create gorgeous geometric patterns and pictures. This retro craft was popular in the 1970s and like many other things from the same era, it’s making a comeback.
Whether you’re a DIY diva or a crafting novice, this guide will help you, step-by-step, through the process of creating your own string art masterpiece.
What You Need
- Wooden board – size depending on your project. You can use scrap wood or but boards, but make sure they are thick enough to knock the nails into and hold securely without splitting.
- 1 inch finishing nails (they come in several colours)
- Cotton embroidery floss/thread in your chosen colours
- Hammer
- Printed pattern/template – start with something simple
- Sticky tape
- Scissors
What to Do
- Attach your template to your wooden board with tape. Ensure it lays flat against the wood.
- Mark out where the nails will be hammered with dots – you can measure these with a ruler (or a marked piece of thread on a curve) if you would like the distances to be equal. About half an inch is a good distance.
- Hammer the nails into these points. Make sure you hammer the nails into the board to roughly the same depth, with enough nail shaft exposed to wind your thread around.
- Remove your template and discard. You will be left with an outline of your shape marked in nails.
- To start stringing, tie your thread securely to one of the nails. Add a tiny spot of superglue for security.
- Outline the shape of the design with your thread, wrapping the thread round each nail as you go.
- Then begin weaving the string from nail to nail, creating a web-like pattern. Keep the thread taught for a neat and sharp pattern. There’s no right or wrong way to do this – just experiment and keep wrapping and crossing your threads until you like the look of it.
- When you are happy with the image, tie off the string on a nail and trim any excess.

String art is a versatile craft that offers a fantastic way to add a personal touch to your home décor or to create unique gifts for friends and family. With a little patience and a lot of fun, you can create a variety of lovely – and ever more complex – designs. Snowflakes, stars, word art – your imagination is the only limit!
If you have a go at string art for the first time, we’d love to hear about your experiences and see your photos, so please share them here in the comments.
Let’s Have a Conversation:
Did you ever do string art in the 1970s – maybe at school as an art project? What did you make? What could you make to create updated, 21st Century designs for your string art?
Read More
Round Up: Ariana Madix’s Season 7 Love Island Looks
Ariana Madix’s Season 7 Love Island Looks / Love Island Season 7 Fashion
Another summer, another season of Love Island USA in the books. We’re so happy for the winners, but I consider being able to admire and shop Ariana Madix’s looks the biggest win. So here’s a roundup of her stellar show style and the looks we loved from Aftersun. And there are even a few left in stock that are ready for you and your closet to couple up with.
The Realest Housewife,
Big Blonde Hair

1 Ariana Madix’s Black Embellished Dress 2 Ariana Madix’s Embellished Cutout Gown 3 Ariana Madix’s Brown Off the Shoulder Metallic Dress 4 Ariana Madix’s Red Latex Look 5 Ariana Madix’s Multi-Color Plunging Sequin Dress 6 Ariana Madix’s Sequin Cutout Gown 7 Ariana Madix’s Hot Pink Cutout Gown 8 Ariana Madix’s Burgundy and Black Crop Top and Skirt Look 9 Ariana Madix’s Orange Embellished Dress 10 Ariana Madix’s Hooded Gown 11 Ariana Madix’s White Bralette and Maxi Skirt

1 Ariana Madix’s Light Blue Crochet Dress 2 Ariana Madix’s Two Piece Orange Look 3 Ariana Madix’s Flower Embellished Dress 4 Ariana Madix’s Ombre Embellished Dress 5 Ariana Madix’s Silver Sequin Cutout Dress 6 Ariana Madix’s Beaded Fruit Dress
Photos: @loveisandusa
Styling: @emilymen
#NSALE Picks
Instagram By Request
-
Kyle Richards’ Flared Jeans
-
Lindsay Hubbard’s Brown Gingham Dress
-

Kyle Richards’ Pink and Red Striped Button Down
-
Tamra Judge’s Pink Lace Shirt
-
Paige DeSorbo’s Pink Cover Up Skirt
-
Kyle Richards’ Pocket Jeans
-
Amanda Batula’s Navy Crop Top and Skirt Set
-
Stassi Schroeder’s Strapless Floral Corset Top
-
Tracy Tutor’s White Fringe Top and Skirt
-
Stassi Schroeder’s White and Tan Bubble Dress
-
Dolores Catania’s Blue Plaid Lace Trim Maxi Dress
-
Kristin Cavallari’s White Cropped Button Down Shirt
-
Cameran Eubanks’ Red Flower Halterneck Dress
-
Amanda Batula’s White Floral Applique Jacket
-
Amanda Batula’s Brown Ruffle Knit Vest
-
Madison LeCroy’s Brown Gingham Button Down
-
Amanda Batula’s White Bubble Hem Maxi Skirt
-
Amanda Batula’s Yellow Collared Top and Skirt
-
Paige DeSorbo’s Yellow Knit Pant Set
-
Lindsay Hubbard’s White Lace Top
-
Amanda Batula’s Brown Corset Midi Dress
-
Stassi Schroeder’s White Polka Dot Jacket
-
Cameran Eubanks’ White and Green Floral Dress
-
Emily Simpson’s Pink Floral Print Maxi Dress
-
Madison LeCroy’s Blue Striped Sweater
Latest Posts
Originally posted at: Round Up: Ariana Madix’s Season 7 Love Island Looks
Read More