
Author: HairWeavings Editorial Team

3 No-Nonsense Ways to Trim Natural Hair at Home

If you haven’t done it, you’ve at least thought about how to trim natural hair at home. I’m sure you know this is a job for your stylist, but when the salon is closed and you’re looking in the mirror like, “who dis?!,” drastic measures must be taken. In this case, that means pretending shears are your specialty and hoping you don’t cut too much or end up with a lopsided ‘do.

First things first, please don’t try to give yourself an America’s Next Top Model-level makeover. Like an at-home fade or short crop, the goal of a DIY trim should be to simply clean up your look and nothing more. In the case of textured hair, expert hairstylist and African Pride Brand Educator Robin Groover recommends focusing on the removal of split ends.

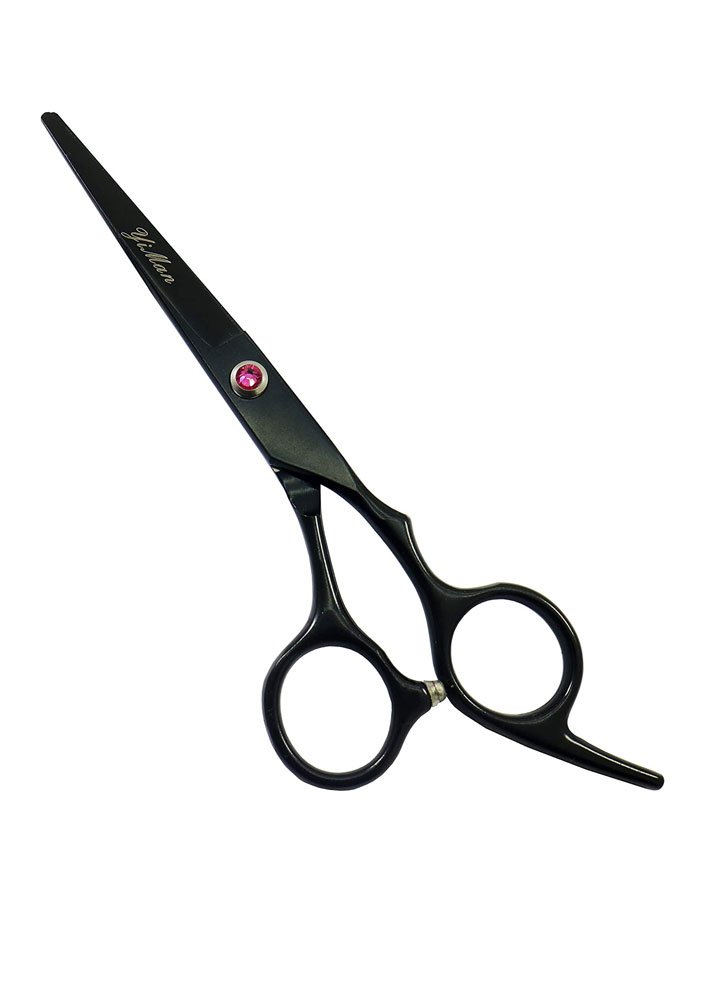
JAVENPROLIU Shears

JAVENPROLIU.

Buy: JAVENPROLIU Shears $17.98

Ahead, a three-step guide to trimming your hair, minus the anxiety. (Be sure to treat your hair to a moisturizing mask or cleanser afterward too. Also avoid cutting your hair while it’s wet to see its true length and how short or long you want to go.)

STEP 1: Identify Split Ends

You’ll know it’s time to nix split ends when your hair is generally unruly, even as it’s styled to precision. “The shape is no longer crisp or sharp when the hair is styled smooth and/or straight,” says Groover. “The split ends create knots for curls and coils on the ends. And as a result, the hair will often break on the ends resulting in length stagnation.”

STEP 2: Trim Hair Based on Curl Pattern

For wavy hair: “Braid each section. Hold the twist or braid at zero degrees, closest to the shoulder area, and snip the less dense strands. It’s easier to do frequent tiny trims than trying to cut at once.”

For curly hair: “Section the hair into 6-8 sections and twist or braid each section.  Smooth the hair into a straighter form with a blow dryer or air drying, then brush for a more even texture. This helps the form to be more even for better precision. Twist each section. Hold the twist at zero degrees, close to the shoulder area, and snip the less dense strands.”

For coily hair: “Section the hair into 6-8 sections and twist or braid each section.  Hold the hair into a straighter form and create a straighter panel with an ionic blow dryer. This helps the form to be more even for better precision. Twist the hair in each section. Hold the twist at zero degrees, close to the shoulder area, and snip the less dense strands. It’s easier to do frequent tiny trims than trying to cut at once.”

STEP 3: Split End Care

Prevention is best when it comes to split ends. The math is simplei 3 No Nonsense Ways to Trim Natural Hair at Home—smarter treatment leads to less breakage. “Monitor the cycle of unruly hair when it’s time for a trim. Once you have identified the time period, be proactive with scheduling an appointment to get ahead of any damage,” adds Groover. “And, be very careful detangling the hair when styling.”

African Pride Moisture Miracle 5 Essential Oils

African Pride.


One of her favorite treatment combos includes pairing a leave-in, like the African Pride Moisture Miracle Leave-In Conditioner with an oil, like the Moisture Miracle 5 Essential Oils.


African Pride Moisture Miracle Leave In Conditioner

African Pride.

Buy: African Pride Moisture Miracle Leave-In Conditioner $8.48

“I mix the two and then paint the mixture on the ends of the hair for 20 minutes before rinsing,” she says.

Keep calm and snip safely.

Our mission at STYLECASTER is to bring style to the people, and we only feature products we think you’ll love as much as we do. Please note that if you purchase something by clicking on a link within this story, we may receive a small commission of the sale and the retailer may receive certain auditable data for accounting purposes.

beauty newsletter banner

Read More

These Vitamins and Supplements from QVC Will Help You to Look and Feel Amazing

These Vitamins and Supplements from QVC Will Help You to Look and Feel Amazing

Most of us associate QVC with high-quality, yet affordable, fashion, lifestyle and skincare products. But, what you may not know is that they also offer a range of vitamins and supplements.

Today, I wanted to share a few vitamins and supplements that you may want to check out on QVC.

Check out all of the vitamins and supplements mentioned in this article on the QVC website.

Below you will find my personal choices for vitamins and supplements.

Incorporate Collagen Into Your Routine

Our bodies produce collagen in abundance when we are young, but, unfortunately, its presence starts to decline with age. This reduction in collagen can result in the skin becoming thinner.

Here are a few collagen supplements that are available from QVC.

This Glotrition Collagen Peptide Drink Mix includes Verisol bioactive collagen peptides, hyaluronic acid, biotin, vitamine C, resveratrol, and cold-press fruit powders.

This delicious crystalline powder blends easily with water to form a tasty and nutritious liquid collagen drink. You’ll also receive a glass bottle to make preparing your peptide drink even easier.

Next up is Dr Denese Firming Facial Collagen Eye Cream.

This lightweight, anti-aging beauty product formulated with soluble collagen, ceramides, shea butter, cocoa butter, squalene, hyaluronic acid and peptides. This cream helps to improve the appearance of dry lines and wrinkles.

I have used Dr Denese products and they feel luxurious and comfortable. 

Algenist GENIUS Liquid Collagen contains alguronic acid, a unique patented naturally occurring compound from microalgae, microalgae oil, niacinamide, vitamin B3, peptides, Matrixyl 3000 and collagen amino acids. You can get it as a single shipment or on auto-delivery.

Help Increase Your Daily Intake of Protein

Protein is one of the major nutrients our body needs every day. One easy way to add protein to everything you eat is with ultrafine, flavorless protein crystals from ReBody. These crystals are easy to sprinkle onto your favorite snacks and dishes. It is a convenient, versatile way to add protein to your diet.

Consider These 3 Vitamins

Turmeric, a spice in the ginger family, is a ubiquitous component in Asian cuisine… including my favorite Indian curries. QVC features Andrew Lessman’s Turmeric 400, which includes turmeric root extract.

Vitamin D3 for Bone Health

Andrew Lessman’s Vitamin D3 vitamins includes calcium and magnesium, because of their shared role in bone health.

Consider Magnesium

Magnesium is an important mineral. It helpssupport strong healthy bones.

Featured on QVC, Andrew Lessman Calcium-Magnesium Intensive Care is a magnesium supplement, which also includes Vitamin D3 and Boron, a trace mineral that is also important for the development and maintenance of healthy bones and joints. This supplement can be ordered in quantities of 60, 250, 500 and 1000.

Check out QVC’s entire range of vitamins and supplements here.

What vitamins or supplements do you take on a regular basis? Why? Are you a fan of QVC?

Read More

The Best Cleansers For Eczema

Cleansing the skin thoroughly is an integral step in most skincare routines, but if you’ve been cursed with eczema or super sensitive skin, it can be a major challenge to get a good deep clean without leaving the skin chapped, irritated, dry and as red as a ripe tomato. Finding the best cleanser for eczema and sensitive skin is no easy feat, and if you suffer from either skin condition, you already know that it can be a downright painful game of trial and error (and plenty of irritation, to be sure) before finding the one. Fortunately, there are plenty of affordable, over-the-counter face washes approved by dermatologists that are gentle enough for highly-reactive and extra-dry skin types. These hydrating formulas are free of some of the most common triggers for eczema flare-ups and overall inflammation, including a slew of chemicals, harsh preservatives, and irritating fragrances, like lanolin, parabens, synthetic dyes and yes, even formaldehyde (sadly, some skincare products actually really do contain the toxic stuff).

In addition to being gentle enough to not cause a reaction, these nourishing cleansers are also infused with a slew of calming ingredients that can actually help soothe irritation, calm redness and restore proper pH and moisture levels in the skin rather than leaving you dry, tight and flaky. Stripping your skin when you wash your face at night — whether you have eczema or not — is one of the easiest ways to cause dryness, flakes and the formation of premature fine lines, so it’s  important to choose a formula that isn’t harsh and laden with things you can’t even begin to pronounce.

Our mission at STYLECASTER is to bring style to the people, and we only feature products we think you’ll love as much as we do. Please note that if you purchase something by clicking on a link within this story, we may receive a small commission of the sale.

Read More

These Innovative Hair Products Will Help You Push Pack Your Next Salon Appointment

Regardless of whether you’re a balayage blonde, coppery brunette, or candy apple red, if you color your hair, you know that dealing with the inevitable root grow-out when you’re in between salon appointments can be a more than just a slight inconvenience. If you’re like me and tend to let your highlights grow out inches before buckling down and scheduling an appointment, you know that finding a fool-proof solution for concealing (or at least, softening) dark roots isn’t exactly easy. I’ve often relied on white-hued dry shampoo to help blend the line of demarcation between my naturally brunette mane and my bleached blonde strands, but once I discovered some of the below root-rescuing hair products to push back my expensive visits with my colorist, I will never go back my little (and, not very effective) DIY hack.

Pushing back your pricey appointment with your colorist just became a bit less painful thanks to these game-changing touch-up and hair-enhancing miracle workers. While they’re certainly not a permanent fix, they’re great for those troublesome times when you’re in a pinch before a big event or simply in between paychecks. Whether you prefer a quick spray-on formula or shine-enhancing color gloss, we’ve outlined a few of our favorite color-reviving products to help get you by when you just can’t make it in to see your colorist.

Our mission at STYLECASTER is to bring style to the people, and we only feature products we think you’ll love as much as we do. Please note that if you purchase something by clicking on a link within this story, we may receive a small commission of the sale and the retailer may receive certain auditable data for accounting purposes.

Read More

Makeup After 60: The Secret to Applying Blush and Bronzer

Makeup-After-60-The-Secret-to-Applying-Blush-and-Bronzer

As women
age, they start to notice that they lose pigment in their skin. This is why you
may notice that your skin tends to look a bit dull or sallow in your 50s and
60s. However, with the right makeup products, it’s easy to revive that gorgeous
youthful glow.

Celebrity makeup artist Ariane Poole shares how blush and bronzer used together can combat tired and sallow-looking skin and add a beautiful glow and a pop of color to your complexion.

Using the Right Brushes

Ariane
reminds us to be sure to use the right brushes to properly apply our product.
Women tend to use very large powder brushes for bronzer. This is not a good
idea. A large brush distributes bronzer all over the face and doesn’t allow for
any precision during application.

Instead of
the big brush, opt for a smaller blush brush or angled contour brush when
applying bronzer. This way, you have more control over where you put the
product.

Applying Bronzer Like a Pro

Once you
have your smaller brush, swirl the brush into the product and tap off the
excess. Then, using the brush, apply bronzer around the sides of the face. Add
a little more bronzer onto your jawline to help accentuate the jaw.

After
framing the face, add some bronzer onto the accents of your face to create a
sun-kissed glow. Glide the brush across your cheeks, chin, forehead, and jaw.
Add a little more bronzer under your cheekbones for contour and definition.

Don’t
forget to add some bronzer to your neck as well!

Applying Blush for a Pop of Color

After applying
bronzer, you have already created a gorgeous glow and revived tired and dull-looking
skin. However, bronzer is not enough to give your cheeks some color. For this, you
will need to use blush.

Using
your favorite blush product and blush brush, apply blush to the apples of your
cheeks. This gives your cheeks a nice punch of color and highlights your
cheekbones.

Bonus Tip – You Can Also Use Cream Bronzer!

If you
aren’t a fan of powdered products, you can opt for a cream variant. A good way
to use a cream bronzer is by mixing it with your primer or tinted foundation
before applying. Then you can use a foundation brush or your fingers to apply
all over your face.

Alternatively,
you can also spread a dollop of cream bronzer on your hand and use your
foundation brush to work it into your forehead, jawline, and under your
cheekbones.

Ultimately
it doesn’t matter what type of bronzer you use, just that you make sure to
include it in your makeup routine. The added glow and shimmer works wonders for
shaving off the years and combating the aging effect of too much matte makeup.

Do you love using bronzer and blush? Do you use
these two products together? What are your favorite bronzer and blush products?
Have any fun tips for the community? Share them in the comments below!

Read More