

Tips to Make Our Lips Look Fuller and More Uplifted (VIDEO)
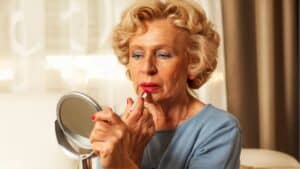
Believe it or not, our lips start losing thickness after the age of 16! This is caused by the loss of collagen, and we continue to lose about 1% of collagen each year. This causes the fat pads in our lips to slowly shrink and thin as we age – which in turn causes our upper lip to flatten and the corners of our mouth to slightly turn down.
Loss of bone density is also a factor since our lips become less supported. Bone loss also causes our lips to roll inward and as a result our upper lips become longer and thinner. These changes are natural, but thank goodness there’s a lot we can do that will make a dramatic difference in helping our lips look fuller and more lifted.
Now we certainly don’t have to do all of the things that I’ll be sharing with you today. I’m simply going to give you a laundry list of different options to consider so you can choose which – if any – of these techniques is right for you.
#1: Exfoliate the Lips!
The first thing we can do is to exfoliate our lips once a week. We’re accomplishing two helpful things when we exfoliate: first, we’re removing dead skin cells which helps smooth our lips. And the smoother our lips are, the more light they reflect which makes them look larger.
The second benefit is increasing the circulation of blood in our lips. And increased circulation stimulates collagen production.
There are many different lip scrubs on the market. I love one from a woman-owned independent beauty company called 3 Graces.
#2: Lip Balm Is a Must-Have
Next, as we all know, it’s very important to moisturize our lips with a lip balm. The skin on our lips is different from other areas of our body since it doesn’t produce oil or sweat. So our lips are very susceptible to drying out and as we get older we’re even more likely to lose moisture.
Applying a lip balm or moisturizer right after we cleanse our skin and before putting on makeup allows time for the lip balm to really sink in and be most effective. It can also be helpful to use a brush or a Q-tip to gently press the lip balm into our lips. And by the way, applying lip balm before we go to bed at night is also extremely beneficial.
You may also want to check the ingredients in the lip balm you’re using since anything we put on our lips ends up in our mouth or gets absorbed into our skin. There’s an easy way to do this. You can simply google: “ewg.org rating of lip balms.”
EWG is the Environmental Working Group and if the name of almost any product is entered, there will be a rating for that product on a scale of “safe” to 10. It’s also important to mention here how absolutely vital it is to up our water intake during the day as well.
#3: Create a Blank Canvas
Always start with a blank canvas for your lip liner. To do this, smile and apply concealer around the edge of your lips. This will also help keep your lipstick from feathering or migrating into those little fine vertical lines that you may have around your lips. Then blend the concealer and make sure it gets into those vertical lines around the lips.
Be sure to check out Elise’s YouTube channel which specifically focuses on makeup tips, techniques, and product reviews for those of us 50+. Don’t forget to subscribe!
#4: Another Use for Highlighter
You can then apply a highlighter along and above the Cupid’s Bow of the upper lip before applying lip liner. This helps the lips look brighter and fuller. In the video I’m using a tiny bit of liquid highlighter from Wet ‘n Wild. Another beautiful highlighter I like to use is one from Becca called “Vanilla Quartz.”
#5: Create a Shadow
Another makeup artist trick is to apply a very small amount of bronzer slightly below the middle of the lower lip with a small, fluffy brush. This creates a shadow which makes the lower lip area look larger. I’m using Benefit’s Hoola Bronzer in the demo and after applying it, I very lightly feather it out.
#6: Create an Upturned Lip
If you have downturned lips and want to make them look more upturned, you need to take a little concealer and cover up the very top edge of your lower lip on each side of your lips. Then, you need to apply lip liner on the lip line or slightly inside the lip line as you bring it up along the new lip line you’ve created by applying the concealer on the outer, upper edge of your lips.
#7: Lip Liner? Yes!
It’s best to choose a lip liner color that matches either your lips or your lipstick. Another option that can work well to make your lips look larger is to choose a lip liner that is slightly darker than your lipstick color. And the key word here is slightly darker!
Where you apply the lip liner is also key. To make your bottom lip look larger, you want to apply the lip liner along the outer edge of your lip. It’s important to first smile and then apply the lip liner along the outer edge of the lips starting in the middle.
If you have downturned lips and want to make them look more upturned, it’s best to start going upward toward the upper lip before you reach the area where the concealer was applied. If you don’t have downturned lips, just follow your natural lip line all the way up toward your upper lip.
In the video I’m using L’Oreal’s Age Perfect Lip Liner which helps prevent lipstick from feathering or migrating into fine lines. Since I don’t have downturned lips, I’m going to follow the natural line of my lips.
Then fill in the lips with the lip liner so if the lipstick wears off a bit, there isn’t just a harsh edge of lip liner on your lips. You can do this with your fingers, a brush or a Q-tip.
To increase the size of the upper lip, start at the Cupid’s Bow of the top lip and go along the outer edge of the top lip and then onto the actual lip line as the lip line meets the lower lip. It’s also helpful to apply it more lightly along the outer edge of the top lips.
Now if you don’t want to increase the size of your upper lip, you can just apply the lip liner along the natural lip line. And then smudge out the lip liner onto the lips as previously mentioned.
#8: The Lipstick Formula Is Important
If you have issues with lipstick feathering or migrating, it’s helpful to first apply a matte lipstick which is less likely to feather or migrate into those fine lines around the lips. If lipstick migrating is not an issue for you, then simply use a satin lipstick or lipstick with some kind of luminosity. More luminous lipsticks reflect light which makes our lips look larger.
If you’ve used a matte lipstick to prevent lipstick from migrating into fine lines, then take a more luminous lipstick and apply it over the matte. However, don’t apply it all the way to the edge of the lips since it’s important to have the matte lipstick remain along the very edge of the lips to prevent the lipstick from feathering.
#9: Choice of Color and a Highlighter Can Help
One more method to make the lips look larger is to help bring them forward by using a lighter colored lipstick or a highlighter (or both) in the center of the bottom lip. In the video I’m using the Becca Shimmering Skin Perfector in “Vanilla Quartz” to add a highlight to the center of the lips.
#10: Gloss Makes a Difference
And the final technique is to add a touch of lip gloss to the center of the lips which also attracts light making the lips look larger. In the video I’m using Huda Beauty’s lip gloss in the color “Mystical.”
All of these techniques will help the lips look larger, but the two that help the most are applying lip liner on the outer edge of the lips and using a luminous lipstick and lip gloss.
Have you noticed that your lips have gotten smaller over the years? Have you tried any of the techniques mentioned in this article? If you’re interested in trying one of these techniques, which technique interests you the most?
Read More





 Source: Instagram
 Source: Instagram
 Source: Instagram
