Whether we use makeup every day, only for special occasions – or we don’t use makeup at all – one thing is certain: these creams, powders and liquids can transform us. Makeup can hide signs of tiredness, skin flaws, signs of aging and can give us a wonderful sense of confidence. And makeup is an age-old form of self-expression and artistic expression where our options are truly limitless.
And, let’s not underrate the importance of our makeup routine giving us “me” time.
Over the years as a makeup artist who specializes in helping those of us over 50 look fabulous, I’ve never ceased to be amazed at the incredible transformational power of makeup. And we can create that transformation with just a few drugstore makeup products in a minimal amount of time. And that’s exactly what we’ll be doing today.
In today’s video, I’m going to use a timer to see how long it takes me to apply the makeup products I’ll be using. But first, I’ll share with you what products I’ll be applying and why I’ll be applying them – before I actually start the timed demonstration. At the end of today’s video, I’ll show you my “before” and “after” photos.
Make Those Brows Visible
Most of us have definitely experienced some changes in our eyebrows – whether it’s our brow hair getting sparser, our tails disappearing or our dark brows giving way to white and grey brow hairs which starts to make our brows look invisible. But when we apply makeup to create more visible brows, our eyes look bigger since our brows frame our face and accentuate our eyes. So the first step in transforming our eyes is to fill in our brows.
I’ve talked a lot about brows previously, so you can find many of my tips here.
In today’s video, I’m going to use my drugstore staple Elf’s Wow Brow which is a wonderfully quick and easy product to use to fill in our brows since it contains hair-like fibers that adhere to brow hairs to give our brows a fuller look.
Be sure to check out Elise’s YouTube channel which specifically focuses on makeup tips, techniques, and product reviews for those of us 50+. Don’t forget to subscribe!
Banish Discoloration and Brighten Eyes
Most of us have some kind of discoloration on our eyelids – usually redness or darkness or both. And often, because the skin on our eyelids gets thinner, veins can also start to show through as they do on my eyes. So, applying a tinted eye primer covers all the discoloration on our eyelids making our eyes look both bigger and brighter.
In addition, since our eyelids can get oily, applying an eye primer also prevents eyeshadow from creasing or smudging. So, for most of us, an eye primer is a multi-tasking must. Since I haven’t found a drugstore eye primer that adequately covers discoloration and is quick and easy to apply, here I’ll apply one of the two non-drugstore products I’ll use today, my Sigma Eye Shadow Base Primer – in the color “Ignite.”
Techniques and Drugstore Products for Hooded Eyes
For eyeshadow, I’m using one of Elf’s Bite Size eyeshadow quads called “I Love You a Latte.” This is a favorite quad because it’s all matte, the shades range from light to dark and they blend incredibly easily. Where we apply these eyeshadow colors, and which colors we use, makes a big difference in transforming our eyes.
Since light colors make things come forward and look bigger and dark colors make things recede and look smaller, I’ll apply the lightest color all the way across my eyelids to make my eyelids look bigger. And to create interest, contrast and depth, which makes the eyes stand out, I’ll apply a mid-tone neutral color from the Elf eyeshadow quad in the crease of my eye and slightly above the crease.
For hooded eyes, it’s important to bring the crease color up high enough above the crease so the color can be seen when we look straight ahead into a mirror with our eyes relaxed.
Eyeliner gives added definition to the eyes which draws attention to them. It not only makes the lashes look fuller, but it also enhances the shape of our eyes. It can be quick and easy to apply a dark eyeshadow color with an eyebrow brush or use an eyeshadow stick as eyeliner. I’ll use the darkest shade of brown from the Elf eyeshadow quad on my top lash line and along just the outer one third of my lower lash line.
And then the final step is to apply mascara to my top and bottom lashes. Mascara instantly adds thickness and length to eyelashes, and the darker color draws attention to the eyes and creates the illusion of bigger eyes.
Because I have very sensitive eyes, there are only three mascaras I’ve found that I can use and unfortunately none of them is a drugstore mascara. So, today I’ll be using Tarte’s “Lights, Camera, Lashes” mascara and Clinique’s Bottom Lash Mascara on my lower lashes.
How to Transform Our Face
Since it’s far faster to apply cream face makeup products that come in a stick applicator, that’s my applicator of choice for most of today’s face makeup. I’ll combine two liquid drugstore foundations I love to get a foundation look with a slight glow.
I’ll apply one pump of L’Oreal’s Age Perfect Radiant Serum Foundation in the shade “Rose Ivory” onto my brush, along with a pump of Catrice’s True Skin Hydrating Foundation in the shade “Cool Rose.” To get a good, solid medium coverage, I’ll apply it with a brush, but if you prefer a sheerer look, applying foundation with a sponge can work beautifully.
To cover up dark circles under my eyes, I’ll swipe on Neutrogena’s Hydro Boost Hydrating Concealer in the shade “Fair” under my eyes.
Minimize Those Jowls and Highlight Those Cheekbones
My contour will be Wet and Wild’s stick contour cream in “Where’s Walnut.” I’ll use contour because although foundation does a great job of evening out my skin tone and covering up redness and discoloration, it does create a look which is flat since my face is all one color.
The contour will add some definition and interest to the face by making some areas recede and some areas come forward. I’ll apply the contour under my cheekbones so my cheekbones will look more prominent, under my jawline to make my jowls look less prominent and along the top of my forehead to make my forehead look smaller.
My stick blush and highlighter are also from Wet and Wild. I’ll be applying the Wet and Wild blush in the shade “Dusty Pink.” I like to apply my blush in the center of my cheekbone right under the pupil of the eye and then take it upward toward my temple to give some lift to my face. I’ll apply the Wet and Wild cream stick highlighter in the shade “When the Nude Strikes” right above my blush.
Bring Those Lips Alive
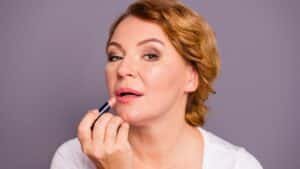
My final touch will be my lipstick and gloss. The lipsticks I use are Elf’s lipstick in “Effortless” and Flower Beauty’s lipstick in “Dahlia Desire.” I’ll top the lipstick with Wet and Wild’s Icon Zodiac gloss in the shade “Libra.”
Timing my makeup application is always a bit nerve wracking, but in today’s video I did apply my makeup in under eight minutes. In fact, I actually did it in seven minutes and two seconds. It really is amazing how quickly and easily we can transform our entire face using some great – and inexpensive – drugstore products!
Let’s Have a Conversation:
Which category of makeup do you feel makes the biggest positive difference in your overall look? Is it blush? Foundation? Eyebrow product? Or something else? What are your favorite products in these categories? Do you have an all-time favorite drugstore product that you won’t do without?


